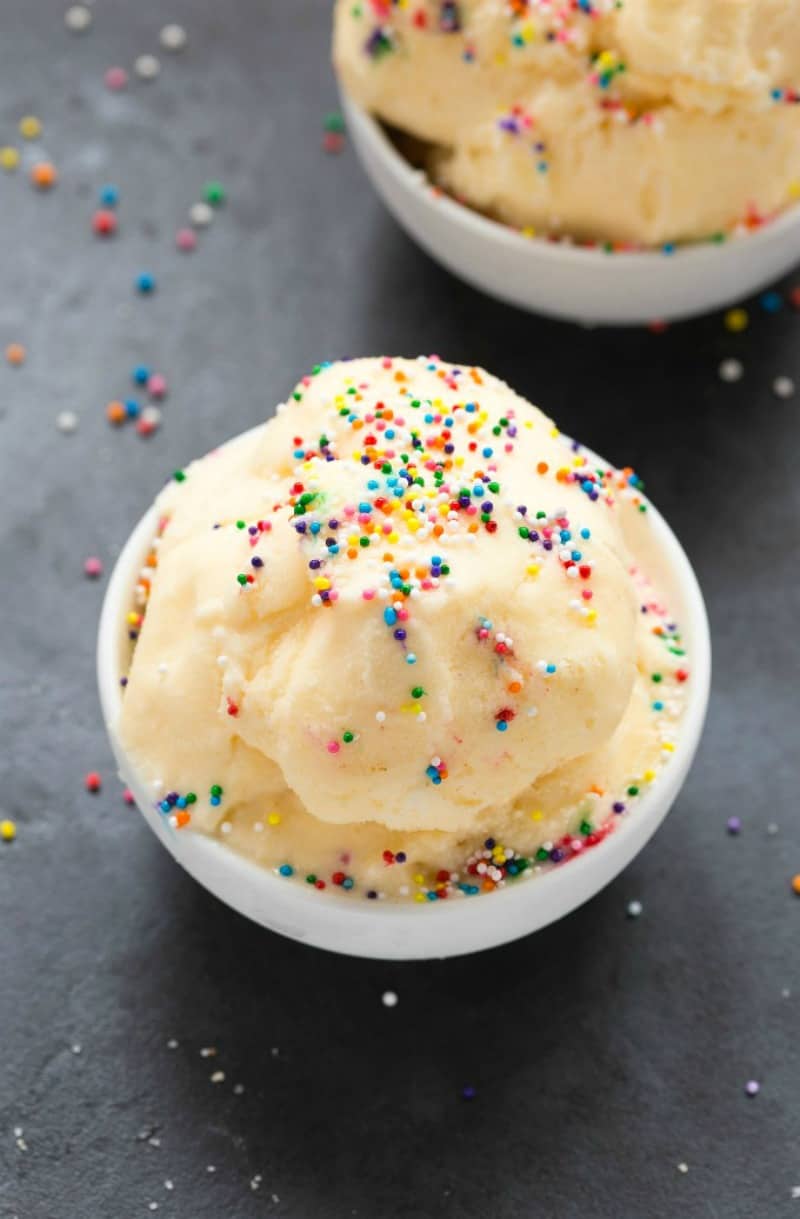
This protein ice cream recipe yields a super creamy frozen dessert that packs in over 15 grams of protein. Made with just three ingredients, I love that it doesn’t need an ice cream maker.

The market is currently saturated with a plethora of protein ice creams, pints of low-calorie and low-sugar dairy treats, and frozen desserts based on protein powder. While some are quite tasty, I think we can agree that the price is not.
Why I love this recipe
- It’s a no-churn recipe. This means that you don’t need to own an ice cream machine!
- You can customize it. This recipe works as a blank canvas that you can flavor any way you like.
- Tastes like regular ice cream. Because let’s face it- that’s the most important part.
- It needs just three ingredients. Coconut milk, protein powder, and a sweetener. Nothing hard-to-find.
- Enjoy it after a workout. While a protein shake works well, post-workout ice cream sounds so much better!
Ingredients needed
- Full Fat Coconut Milk. Gives the ice cream that ultra creamy and smooth texture instead of icy. The higher fat content also helps the ice cream be scoopable, something many homemade ice creams lack! The coconut milk must be from a can and must be chilled prior.
- Protein Powder. I like to use vanilla protein powder as it adds a subtle vanilla flavor but plain also works.
- Granulated Sweetener of choice OR dates.There is the option to use either dates or a granulated sweetener to add sweetness. Either white sugar, allulose (it’s sugar free and low carb), or coconut sugar works.
- Vanilla extract. It’s optional, but it enhances the vanilla flavor. Omit if you are making another flavor.
How to make protein ice cream
I’ve included step-by-step photos below to make this recipe easy to follow at home. For the full printable recipe instructions and ingredient quantities, scroll to the recipe card at the bottom of this post.
Step 1- Prep. Before making the ice cream, place a loaf pan in the freezer for at least an hour.
Step 2- Blend. Next, add your chilled coconut milk to the blender and blend for just a minute or two. You want the texture to be silky and smooth. Chilling it prior ensures the cream separates from the liquid. The entire can will be used, but it helps with consistency. Add your protein powder and sweetener (or dates) and blend until smooth and creamy.
Step 3- Stir and chill. Transfer to the loaf pan and place in the freezer. For the first hour, stir the ice cream three times every 20 minutes.
Step 4- Serve. Rremove the protein ice cream from the freezer for 10-15 minutes to thaw slightly. Scoop out into bowls and enjoy.

Recipe tips and variations
- Please ensure that you use full-fat coconut milk over light or low-fat varieties. The latter will yield a very icy consistency and be difficult to scoop.
- Pre-freeze the loaf pan before adding the ice cream mixture to it to freeze. It will help the ice cream freeze more evenly.
- If you want to use another milk or non-dairy milk, you’ll need to add a frozen banana or frozen fruit of your choice to be able to scoop it. You can even use straight fruit and omit the liquid completely.
- Using the correct protein powder is key, as different brands and kinds will yield different results. Brown rice, casein, and pea protein are all fantastic choices. I prefer casein because, unlike other protein powders, it is incredibly thick and creamy. Depending on your brand, it can also be delicious and not overly sweet.
Flavor variations
As mentioned earlier, this protein powder ice cream is a blank canvas that you can flavor in many ways! Here are some ideas:
- Chocolate– Use chocolate protein powder and add 1-2 tablespoons of cocoa powder.
- Cookie dough– Make a batch of protein cookie dough and crumble it into the mixture.
- Strawberry cheesecake– Add 1/4 cup of frozen strawberries and stir through some cottage cheese ice cream.
- Peanut butter– Drizzle 2-3 tablespoons of peanut butter before blending.
- Cookies and cream– Crumble some Oreo sandwich cookies.
- Mixed berries– Add some frozen berries to the mixture before freezing.
Storage instructions
To store: Protein ice cream should always be covered completely in the freezer, in a freezer-friendly container. It can be frozen for at least five days.
To re-freeze: Re-freezing the ice cream is not recommended, as it will build up ice particles. If you’ve refrozen it and it is no longer creamy, let it soften and re-blend it in the blender. It will have a soft serve consistency.

Frequently asked questions
Can I use any type of protein powder?
The best protein powder for protein ice cream is brown rice, casein, or pea protein. Avoid using whey protein powder as it tends to freeze hard and yield an icey treat instead of a creamy one.
Can I use an ice cream machine?
Yes! Simply add the mixture to your ice cream machine container, churn for 30 minutes, then freeze for an hour. You can also make it in a Ninja creami (see my Ninja creami recipes for tips).
Can I make this recipe vegan?
Yes, if you use a plant-based protein powder, there will be no dairy in it whatsoever.
How can I make the ice cream thicker or creamier?
You can make protein ice cream creamier by blending through a frozen banana or raw cashews or adding a high-fat element, like cream or nut butter.
How much protein is in protein ice cream?
There are 15 grams of protein per serving of protein ice cream.
WANT TO SAVE THIS RECIPE?
Enter your email to receive this recipe, along with weekly food inspiration!GO Send me new recipes from The Big Man’s World
Protein Ice Cream (3 Ingredients!)
4.98 from 685 votes
This no churn protein ice cream recipe is a guilt-free frozen dessert made with just 3 ingredients! It’s creamy, smooth, and made in a blender. Watch the video below to see how I make it in my kitchen.
Servings:
Prep:5minutes mins
Cook:2minutes mins
Total:7minutes mins
Ingredients 1x2x3x
- ▢28 ounces canned coconut milk chilled
- ▢1 cup protein powder * See notes
- ▢1-2 tablespoon allulose ** See notes
- ▢1 teaspoon vanilla extract optional
Instructions
- Place a large, deep loaf pan or deep pan in the freezer.
- In a blender or food processor, add your coconut milk and blend until smooth and creamy. Add your protein powder and granulated sweetener or dates and blend until a thick and creamy texture remains.
- Transfer workout protein ice cream to the loaf pan. To ensure it doesn’t become too icy, lightly mix your ice cream ever 20-30 minutes for the first hour.
- Thaw for 10-15 minutes before eating. Lightly wet an ice cream scoop before scooping the ice cream into a bowl.
- To enjoy it soft serve style, let it thaw to desired texture.
Notes
* You can use up to 4 scoops (2 cups) of protein powder in this recipe. If you use more, blend for a longer period of time and consider adding an extra half a can of coconut milk for extra creaminess.
** You can sub this for 1/2 cup Medjool dates.
TO STORE: Protein ice cream should always be covered completely in the freezer in a freezer-friendly container. The ice cream can be frozen for at least five days.
TO RE-FREEZE: Re-freezing the ice cream is not recommended, as it will build up ice particles. If you’ve refrozen it and it is no longer creamy, let it soften and re-blend it in the blender. It will have a soft serve consistency.
Nutrition
Serving: 1servingCalories: 145kcalCarbohydrates: 7gProtein: 15gFat: 8gSodium: 35mgPotassium: 302mgFiber: 2gSugar: 4gVitamin A: 36IUVitamin C: 3mgCalcium: 60mgIron: 3mgNET CARBS: 5g